| 일 | 월 | 화 | 수 | 목 | 금 | 토 |
|---|---|---|---|---|---|---|
| 1 | 2 | 3 | ||||
| 4 | 5 | 6 | 7 | 8 | 9 | 10 |
| 11 | 12 | 13 | 14 | 15 | 16 | 17 |
| 18 | 19 | 20 | 21 | 22 | 23 | 24 |
| 25 | 26 | 27 | 28 | 29 | 30 | 31 |
- ontap
- POP
- AppBar
- figma
- button
- Webflow
- PushNamed
- InputDecoration
- sizedbox
- TextEditingController
- Routing
- scaffoldmessenger
- Scaffold
- dart
- AlertDialog
- switch
- ElevatedButton
- textField
- slider
- Snackbar
- GestureDetector
- flutter
- icon
- FloatingActionButton
- list
- image
- navigator
- drawer
- vscode
- stateful
- Today
- Total
재밌는거🌈
Flutter_23. Add Card, Cupertino, Picker 본문
Flutter 장점 중 하나가 바로, Material과 Cupertino를 동시에 사용할 수 있다는 점이다.
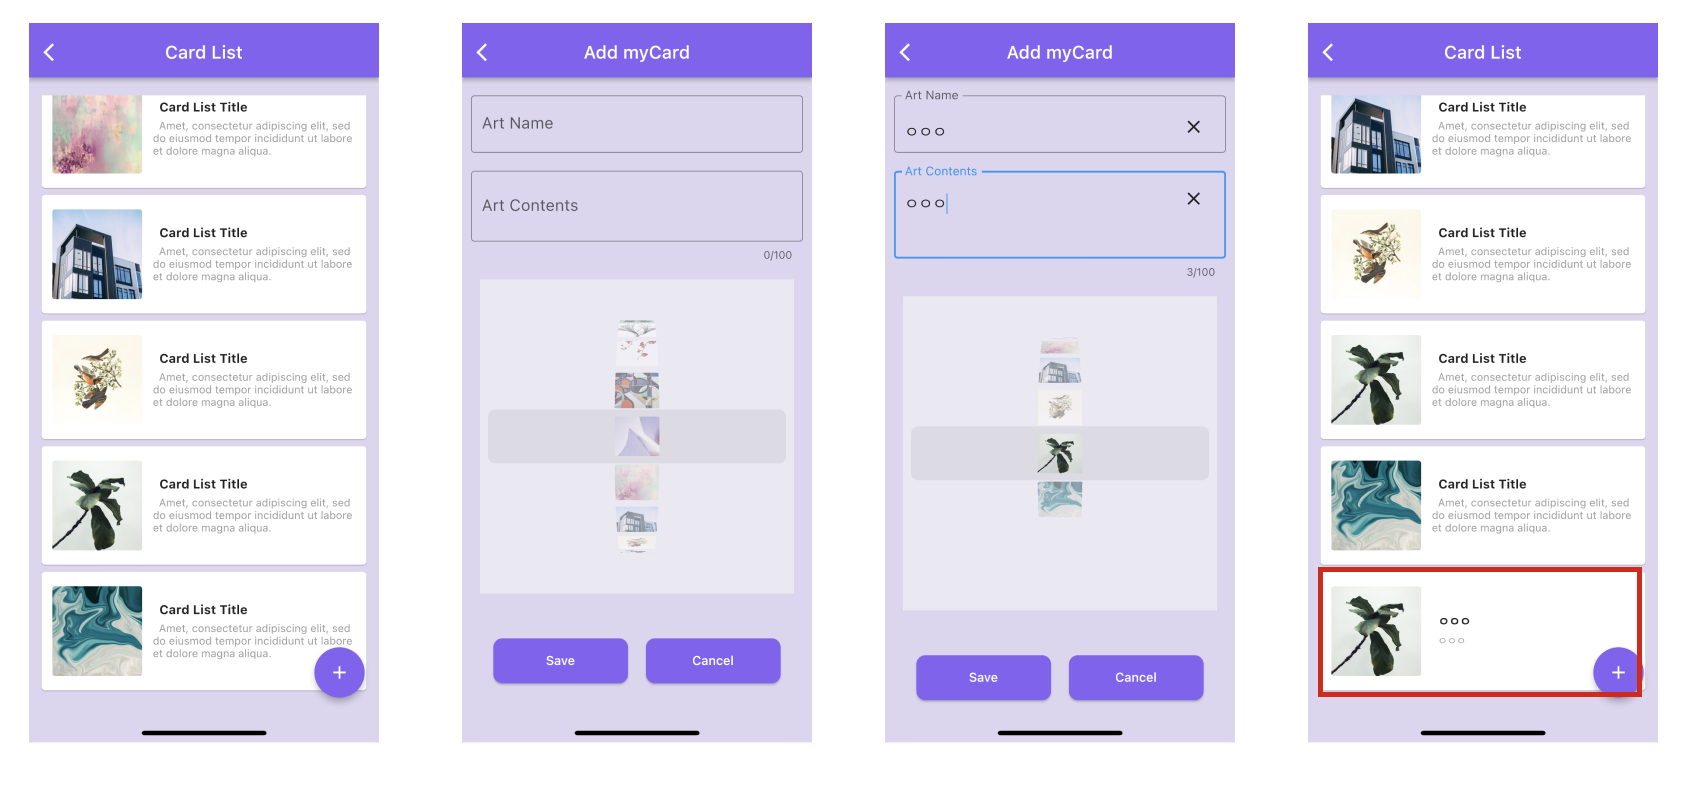
Cupertino의 Picker를 오늘 정리하면서, 지난 포스팅에 만든 Add Card 코드를 조금 수정해보도록 하겠다.
2023.05.14 - [개발하기] - Flutter_22. CardList, Add Card, TextField, TextArea, Clear Button
CupertinoPicker의 상세 내용은 아래 링크 참고 :)
https://api.flutter.dev/flutter/cupertino/CupertinoPicker-class.html
CupertinoPicker class - cupertino library - Dart API
An iOS-styled picker. Displays its children widgets on a wheel for selection and calls back when the currently selected item changes. By default, the first child in children will be the initially selected child. The index of a different child can be specif
api.flutter.dev
CupertinoPicker, Text
1) 변수 선언 : Picker에 사용할 이미지 List와 선택한 아이템 Index 변수
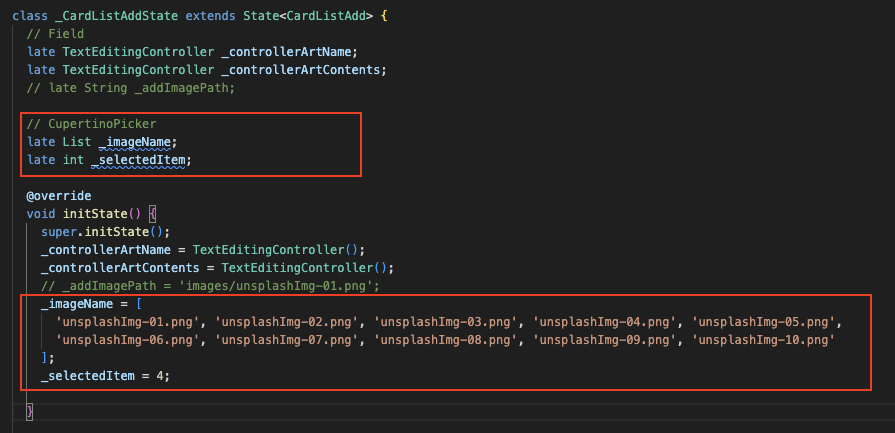
2) body에서 이미지 영역 주석처리하고, Picker 추가
❊ CupertinoPicker
- itemExtent : 선택한 아이템 표시 높이
- onSelectedItemChanged : 선택 했을 때의 Event
- children : [피커에 보여줄 데이터 리스트]
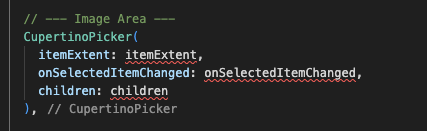
3) Picker 기본 셋팅하고, SizedBox로 감기
피커에 보여줄 데이터 리스트는 우선 이미지 파일명으로 출력하였다.
잘 출력되는지 확인한 뒤에, Image.asset으로 변경할 예정 :)
❊ CupertinoPicker
- scrollController : FixedExtentScrollController(initialItem: 디폴트 아이템 지정 가능)
- backgroundColor : 피커 배경 칼라 설정
4) 저장하고 화면 확인
CupertinoPicker, Image
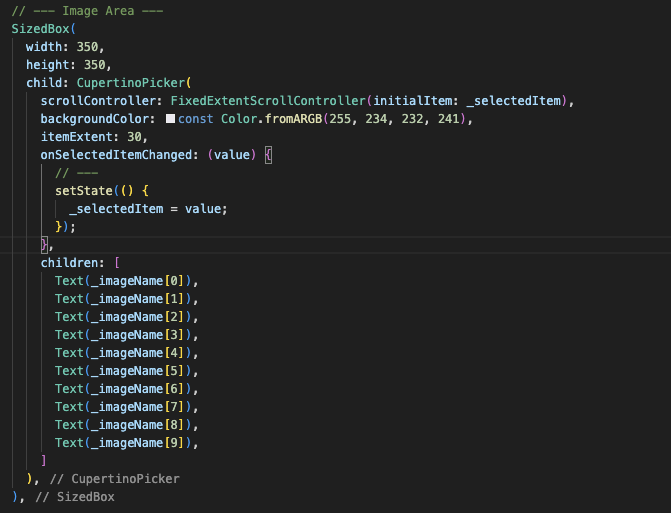
1) Picker의 children[] 배열 안에 이미지 추가
이미지 코드는 다음과 같다. 우선 1-3개를 등록해보고, 이상이 없다면 복사하여 Picker children을 완성해주자.
  Padding(
    padding: const EdgeInsets.all(8.0),
    child: SizedBox(
      width: 50,
      height: 50,
      child: Image.asset(
        "images/${_imageName[0]}",
        fit: BoxFit.fill,
        width: 20,
        height: 20,
      ),
    ),
  ),
2) 저장하고 신규 카드 추가 기능 확인
선택한 이미지가 신규 카드로 정상 생성된다. :)